In my previous article we have learned how to configure-create s3 bucket in AWS. Once you have created or configured s3 bucket in the next step we can upload objects-files in s3 bucket. This article will quickly guide you on how to upload objects-files in s3 bucket.
Two ways to upload objects-files in s3 bucket:
- Upload objects-files in s3 bucket using “Drag and drop method”
- Perform Upload objects-files in s3 bucket using “point and clicking”
-
Upload objects-files in s3 bucket using “Drag and drop method”
Step 1: Login to AWS managment console and click on S3 component in console. Basically you can accomplish this by accessing URL “https://s3.console.aws.amazon.com”.
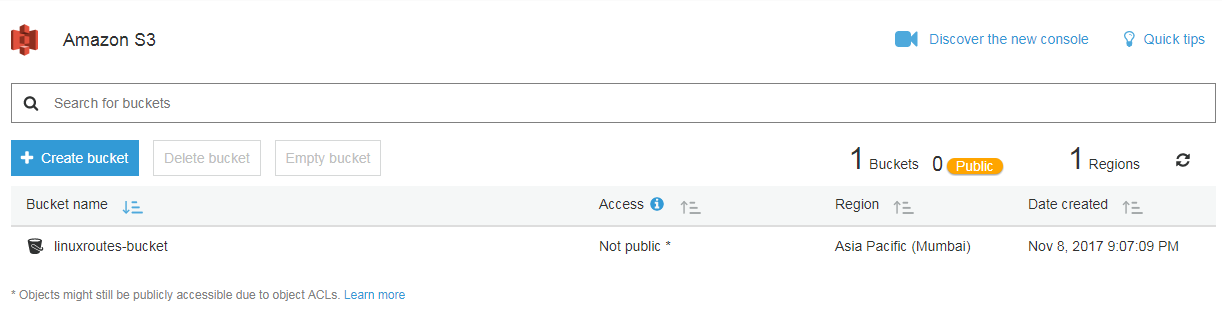
Step 2: You will see buckets inside this, you have configured bucket as below:
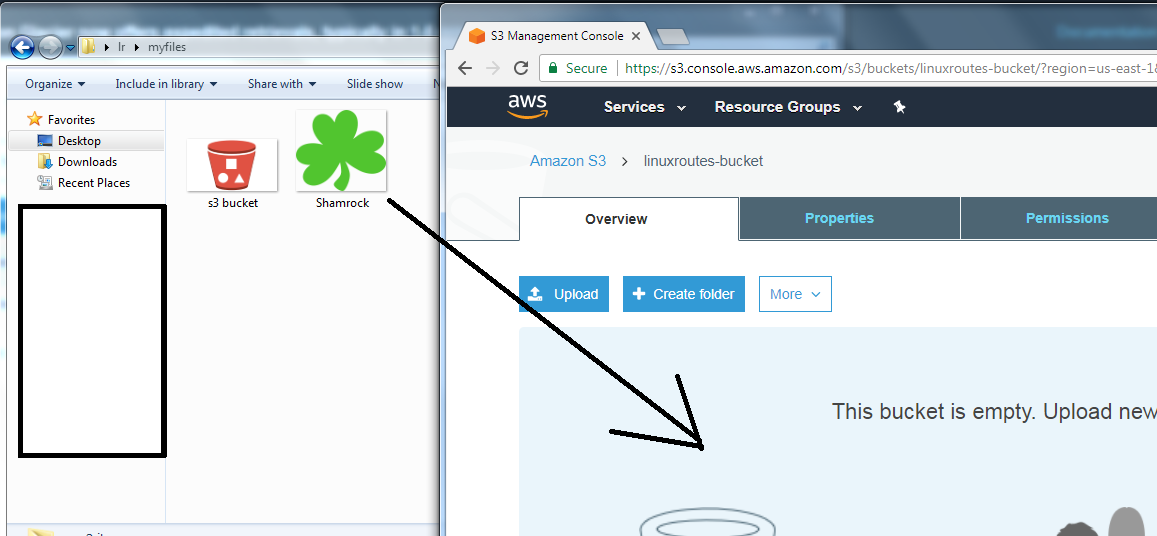
Step 3: Select particular bucket by clicking on bucket name.
Step 4: Just drag and drop files or objects from your local system to s3 bucket as below:
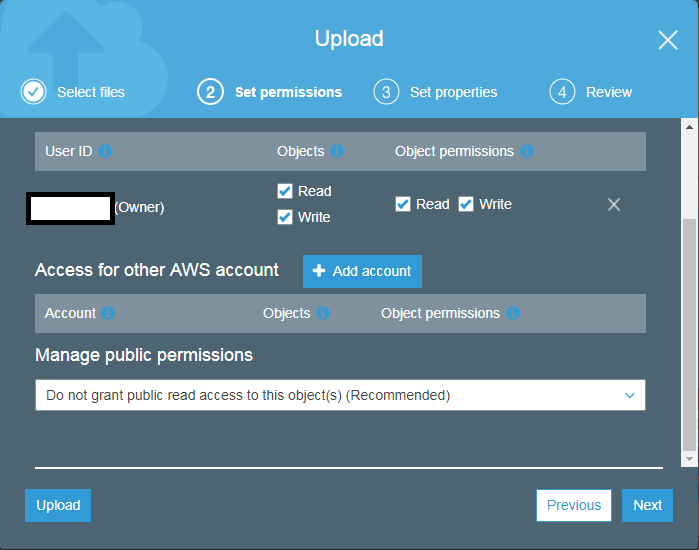
Step 5: In the pop window system will show files and their details such as size etc. In case you want to go with default permissions and properties simply click on upload button. Otherwise to set permission click Next. Where you can set account level permissions also you set public read permissions for objects or files inside the bucket as below and click Next to set properties:
Step 6: Inside set properties tab system allows us to configure below set of parameter-configuration.
A: Storage class: In this you can select type of class that suits your requirement and costing. Following storage class are available in S3.
- Standard: This one is stanadard or default storage classs.
- Standard-IA: In this storage class you can keep infrequently access data which required less frequent however at higher speed for reduction of cost. ex. Salary slips data.
- Reduced redundancy: Suitable for reproducible data at much cheaper price. ex. thumbnails of files.
B: Encryption: Using this option you can select different encryption type as below:
- None
- Amazon S3 master-key
- AWS KMS master-key
C: Metadata: With this you can set information about data about data. Metadata for Amazon S3 objects is represented by a name-value (key-value) pair.
D: Tags: Using tags helps us to identify and managing the data. Its represented by a key-value pair. Click Next.
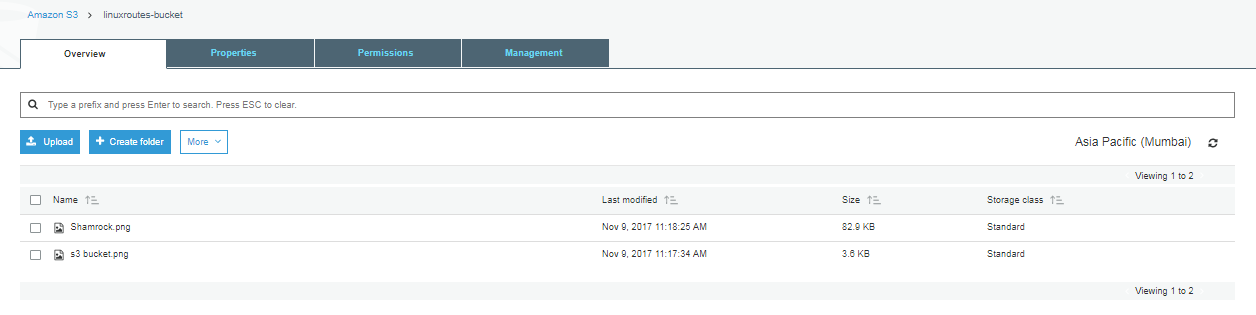
Step 7: Under review tab system provide us configuration for verification. Click Upload is the last step to upload objects-files in s3 bucket. After successful upload you can able to view objects or files inside bucket as below:
-
Upload objects-files in s3 bucket using “point and clicking”
Step 1: Login to AWS management console and click on S3 component in console. Basically you can accomplish this by accessing URL “https://s3.console.aws.amazon.com”.
Step 2: You will see buckets inside this, you have configured bucket as below:
Step 3: Select particular bucket by clicking on bucket name.
Step 4: Click on Upload button to select objects or files from your local system.
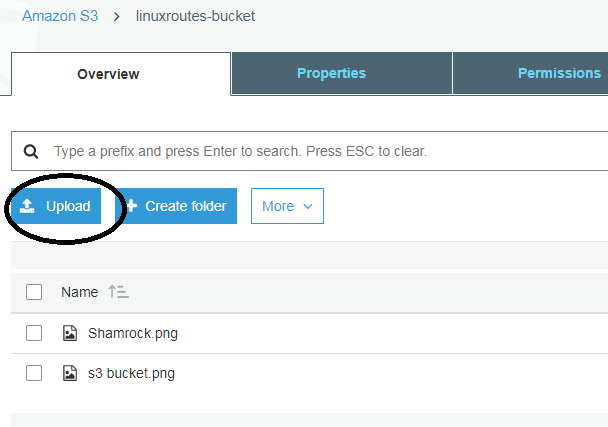
Here onward Step 5 till end step will remain same as for the drag and drop method.
This is the quickest way to upload objects-files in s3 bucket.
Get your free copy of shell scripting guide in PDF format!!!!
Download This Book: Click Here!!