In AWS, s3 stands for simple storage system which is used for storing unlimited data and you can access it using internet. This article will guide you about how to configure s3 bucket in AWS.
How to configure s3 bucket in AWS.
In order to configure s3 in AWS, you need to create bucket first. Basically s3 bucket resembles the directory or folder where you can store objects or files. These objects can be then accessed over internet.
Steps to configure s3 bucket in AWS.
Step 1: Login to AWS managment console and click on S3 component in console. Basically you can accomplish this by accessing URL “https://s3.console.aws.amazon.com”.
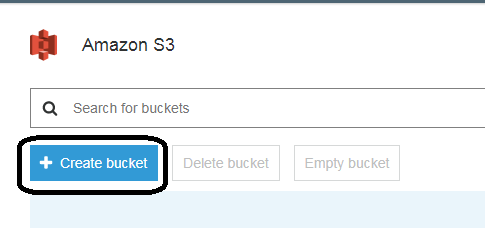
Step 2: Click on “Create bucket” Button on console.
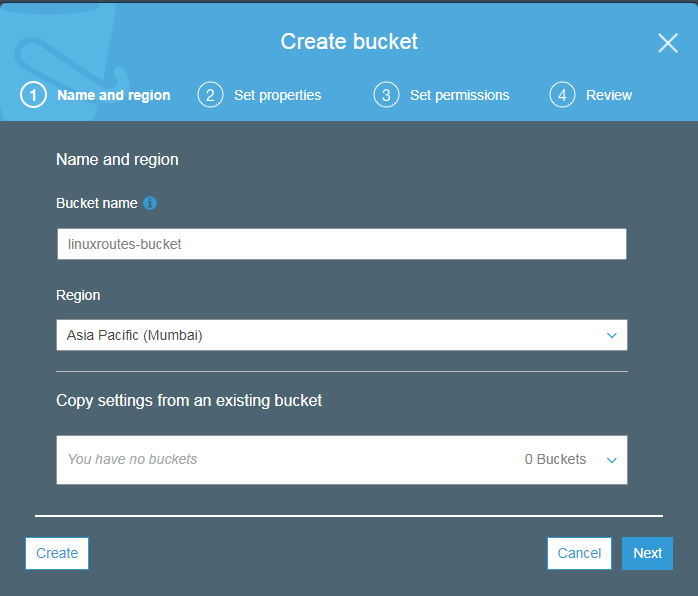
Step 3: Give name for your bucket. Kindly note that, your bucket name should be universally unique and also it should not be in upper-case letters to check all the rules regarding bucket naming kindly check addition rules.
Step 4: Select Region where you want to store the data and In case you want to, apply any existing s3 bucket settings you can select the one, otherwise you can be ignored. Click Next.
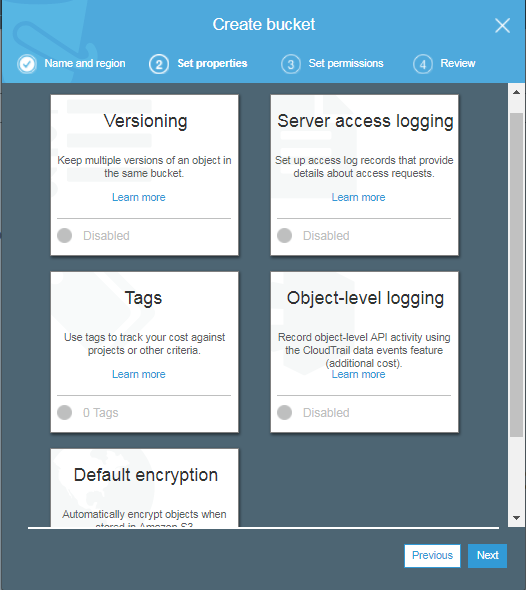
Step 5: Under”Set properties” tab you can configure or setup following things:
A: Versioning: Using versioning you can able to maintain multiple version of the objects within s3. By default its disabled.
B: Server access logging: With this option you can able to see the access logs for s3.
C: Tags: This comes handy for tracking down the costing for different projects or group of projects. It consists of two fields key and value.
D: Object-level logging: Helps us to track down the API activity at the object level with the help of Cloud trail.
E: Default encryption: With this option you can encrypt the objects while they are getting store in bucket. There following options available under encryption.
- None
- AES-256
- AWS-KMS
Select appropriate options as per your need and click Next.
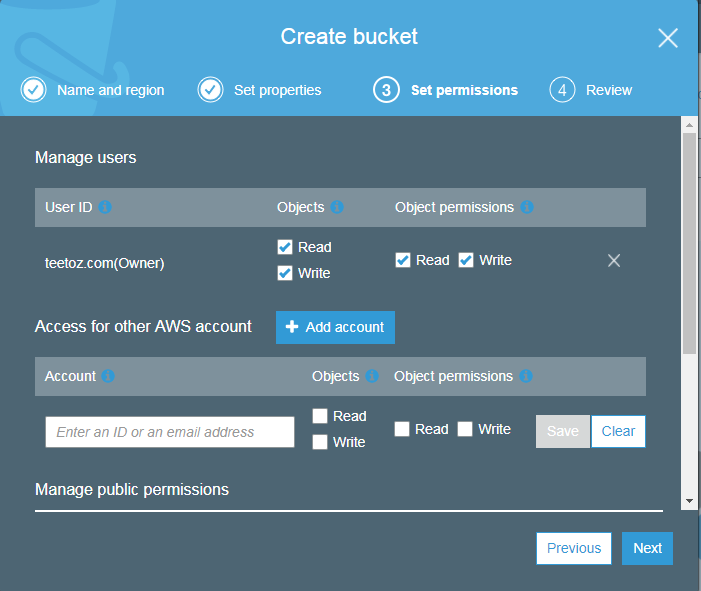
Step 6: With”Set permissions” tab you can set permissions for objects within bucket.
Make sure you do not use or avoid selecting “Grant public read access to this bucket” which enables anyone can access the objects within bucket. And click Next.
Step 7: In the next “Review” tab, system allows us to verify all the settings. Click on “Create bucket” button if everything looks good.
At the end you can see created bucket inside console.
This how we can configure s3 bucket in AWS.
In case want to Learn how to mount s3 bucket in AWS.