Nowadays the whole world revolves around API. So get into the API world today I am going to explain to you “How to Create simple API using FastAPI in Python”.
About FastAPI:
FastAPI is a framework written in Python 3. FastAPI also gives you the flexibility to provide you Swagger UI documentation which helps you if you are working in a multimember team or to give it a front-end team. Also, you don’t need a tool like Postman to test your API. It’s really easy to code your API if you know a little bit about Python. To check more details on the same please check this link
Pre-requisite for FastAPI
- Python 3.6+
- FastAPI module (Can be installed using pip3)
- Uvicorn (webserver hosting the api in your system. This also can be istalled using pip3)
- Editor (vs Code)
Steps to Create simple API using FastAPI in Python
- Install Python 3.6+. Please follow this link to complete this. Make sure you install versions greater than 3.6.
- Create a Virtual environment using the below command:
python3 -m venv myfastapienv
The above command creates the subdirectory called mysfastapinv which is the name we gave to our virtual environment.
Activate the virtual environment.
C:\FastAPI> .\myfastapienv\Scripts\activate

(myfastapienv) C:\FastAPI>
Now you will see that our virtual environment is activated as shown above.
Install fastapi and uvicorn.
- Install the FastAPI and Uvicorn which will be the web server for the FastAPI using the below command:
(myfastapienv) C:\FastAPI>pip3 install fastapi uvicorn
2. Now we will create the sample python script with .py extension. in the “/myfastapienv/Scripts” location called main.py as below:
from fastapi import FastAPI

app = FastAPI()

@app.get("/")
def baseurl():
    return {"Hello from Base PATH"}

@app.get("/hello")
def baseurl():
    return {"Hello from /hello PATH"}

@app.get('/user/{name}')
def show(name: str):
    return {f"Hello from the /user PATH {name}"}
Following is a description of the code:
Line 1: At line 1 we imported FastAPI library
Line 3: At line 3 we created one instance of the FastAPI class called “app”. This name can be anything.
Line 5-7: Between the line 5-7 we define the PATH and respective function to be called which simply returns “Hello from Base PATH” message. This request is of the type “GET”. This is the default PATH of our API.
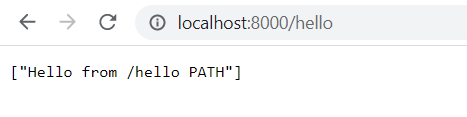
Line 9-11: Between the line 9-11 we define the PATH and respective function to be called which simply returns“Hello from /hello PATH” message. This request is of the type “GET”.
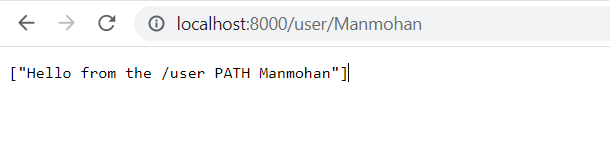
Line 13-15: Between the line 13-15 we define the PATH and respective function to be called which simply returns f“Hello from the /user PATH {name}” message. This request is of the type “GET”. Here we passing the name variable and printing the Hello message to that user.
Start the uvicorn webserver:
Once you save the file at the command prompt use the below command to start the uvincorn webserver. Here we have used reload parameter so that we don’t have to restart the web server every time we save the main.py file.
(myfastapienv) C:\FastAPI\myfastapienv\Scripts>uvicorn main:app --reload
If you look at line 1 we are using main parameter since we are using “main.py” in our demo and “app” parameter since its the name of the instance we created in the main.py file(check line 3 from the code)
Log snippet:
(myfastapienv) C:\FastAPI\myfastapienv\Scripts>uvicorn main:app --reload
←[32mINFO←[0m:     Will watch for changes in these directories: ['C:\\FastAPI\\myfastapienv\\Scripts']
←[32mINFO←[0m:     Uvicorn running on ←[1mhttp://127.0.0.1:8000←[0m (Press CTRL+C to quit)
←[32mINFO←[0m:     Started reloader process [←[36m←[1m3396←[0m] using ←[36m←[1mstatreload←[0m
←[32mINFO←[0m:     Started server process [←[36m1584←[0m]
←[32mINFO←[0m:     Waiting for application startup.
←[32mINFO←[0m:     Application startup complete.
If you check the above logs our API URL is “http://localhost:8000”
Now let’s just access the following URL to check if everything is working is fine or not.
Base URL 1: http://localhost:8000/
hello URL 2: http://localhost:8000/hello
user URL 3: http://localhost:8000/user/Manmohan
Please note here parameter Manmohan can be replaced with any name. Our API will print out Hello message accordingly.
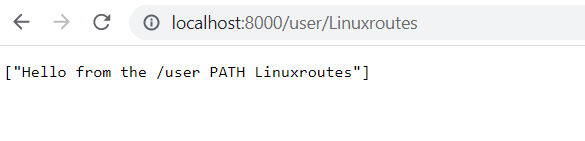
OR http://localhost:8000/user/Linuxroutes
Swagger UI:
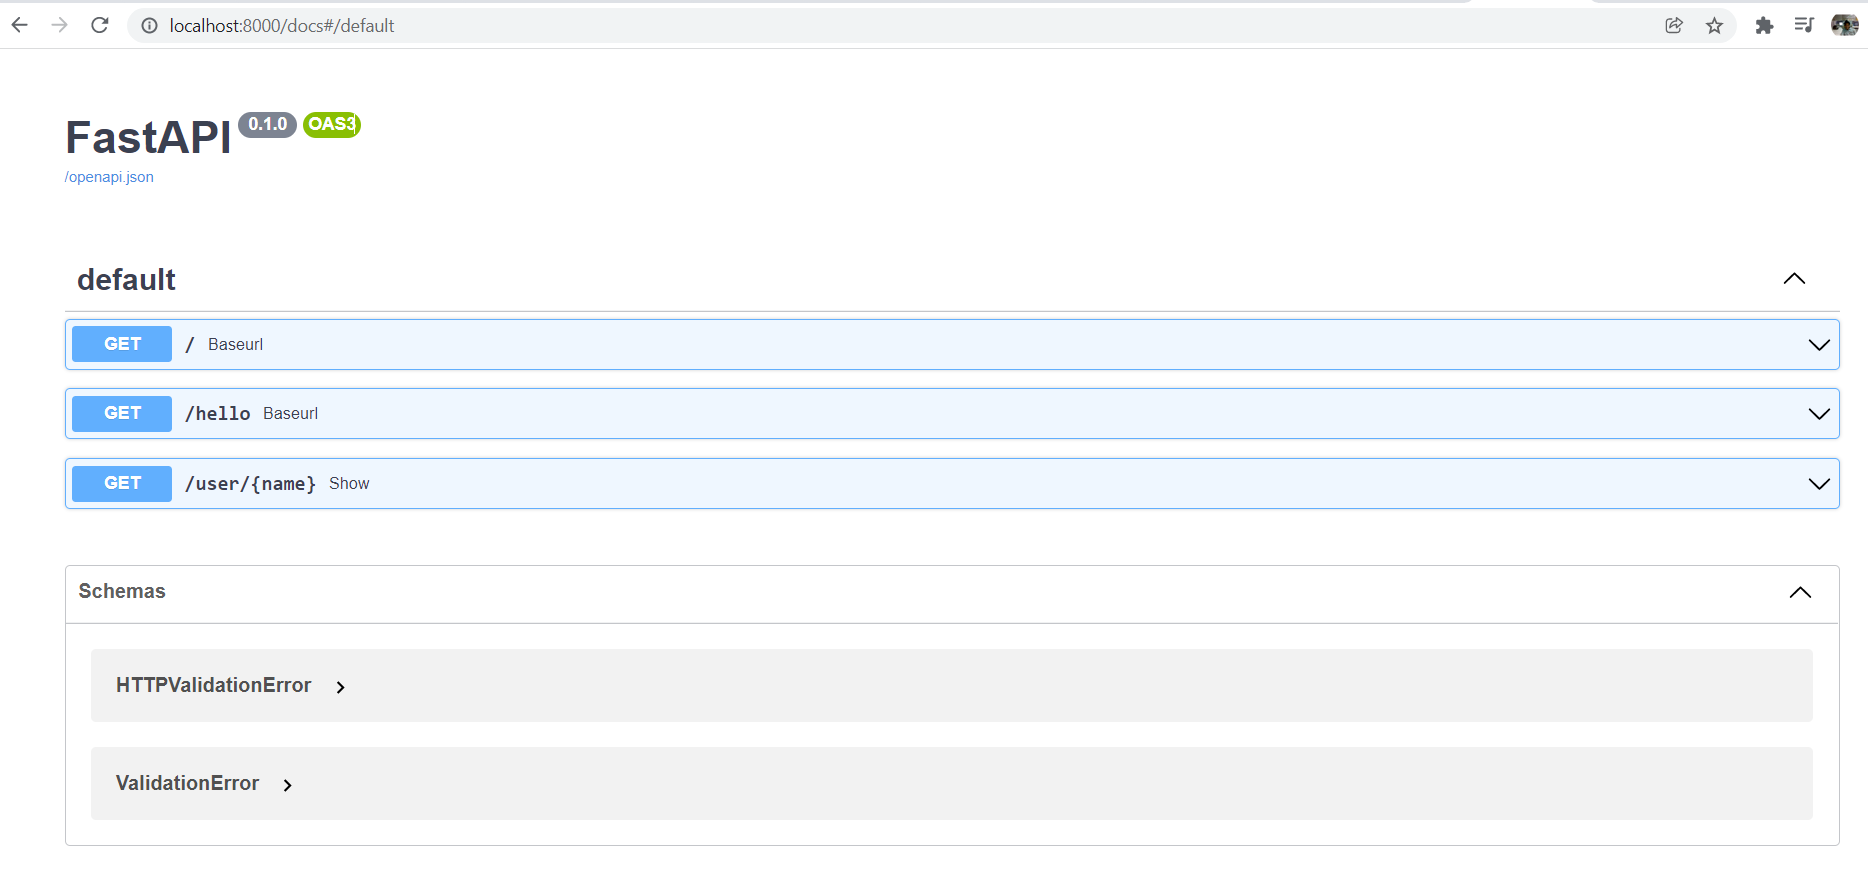
Another nice feature of FastAPI is Swagger UI. This means FastAPI gives us nice documentation about the API created automatically. To access the Swagger UI simply append /docs to your main URL of the API. In our case it is “http://localhost:8000/docs”
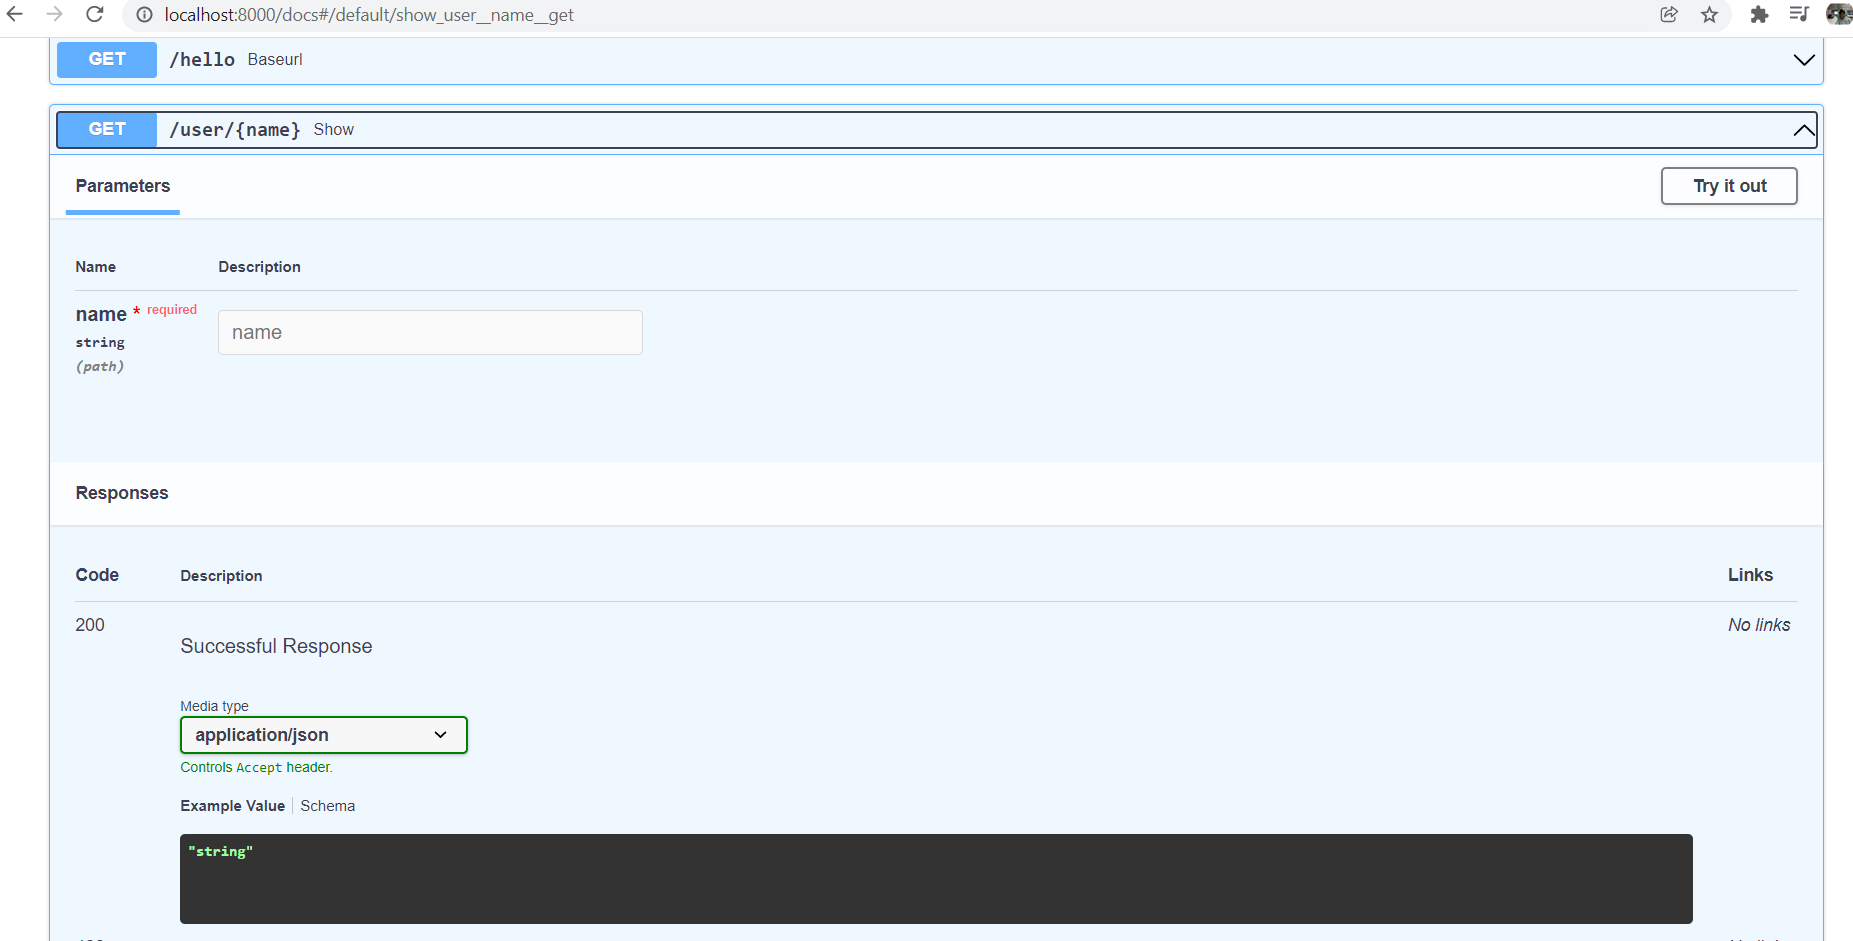
If you look at above screenshot it mentioned about three PATHs which are of the type GET. Also if you click down arrow given at right side of each PATH you will come to know more details such as mandatory field and field type etc. as below:
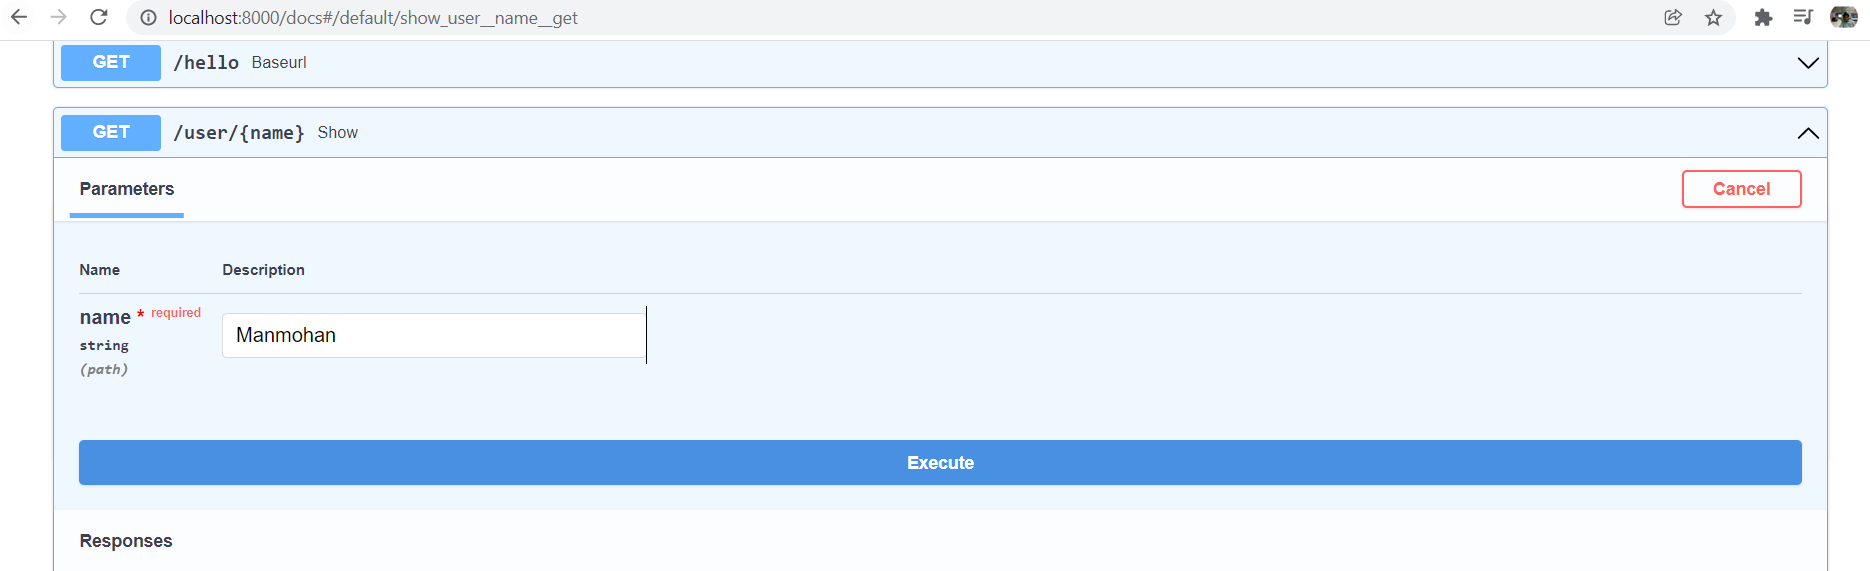
In case you want to pass some parameters to the API simply click on “Try out” button. and enter the parameter value as below:
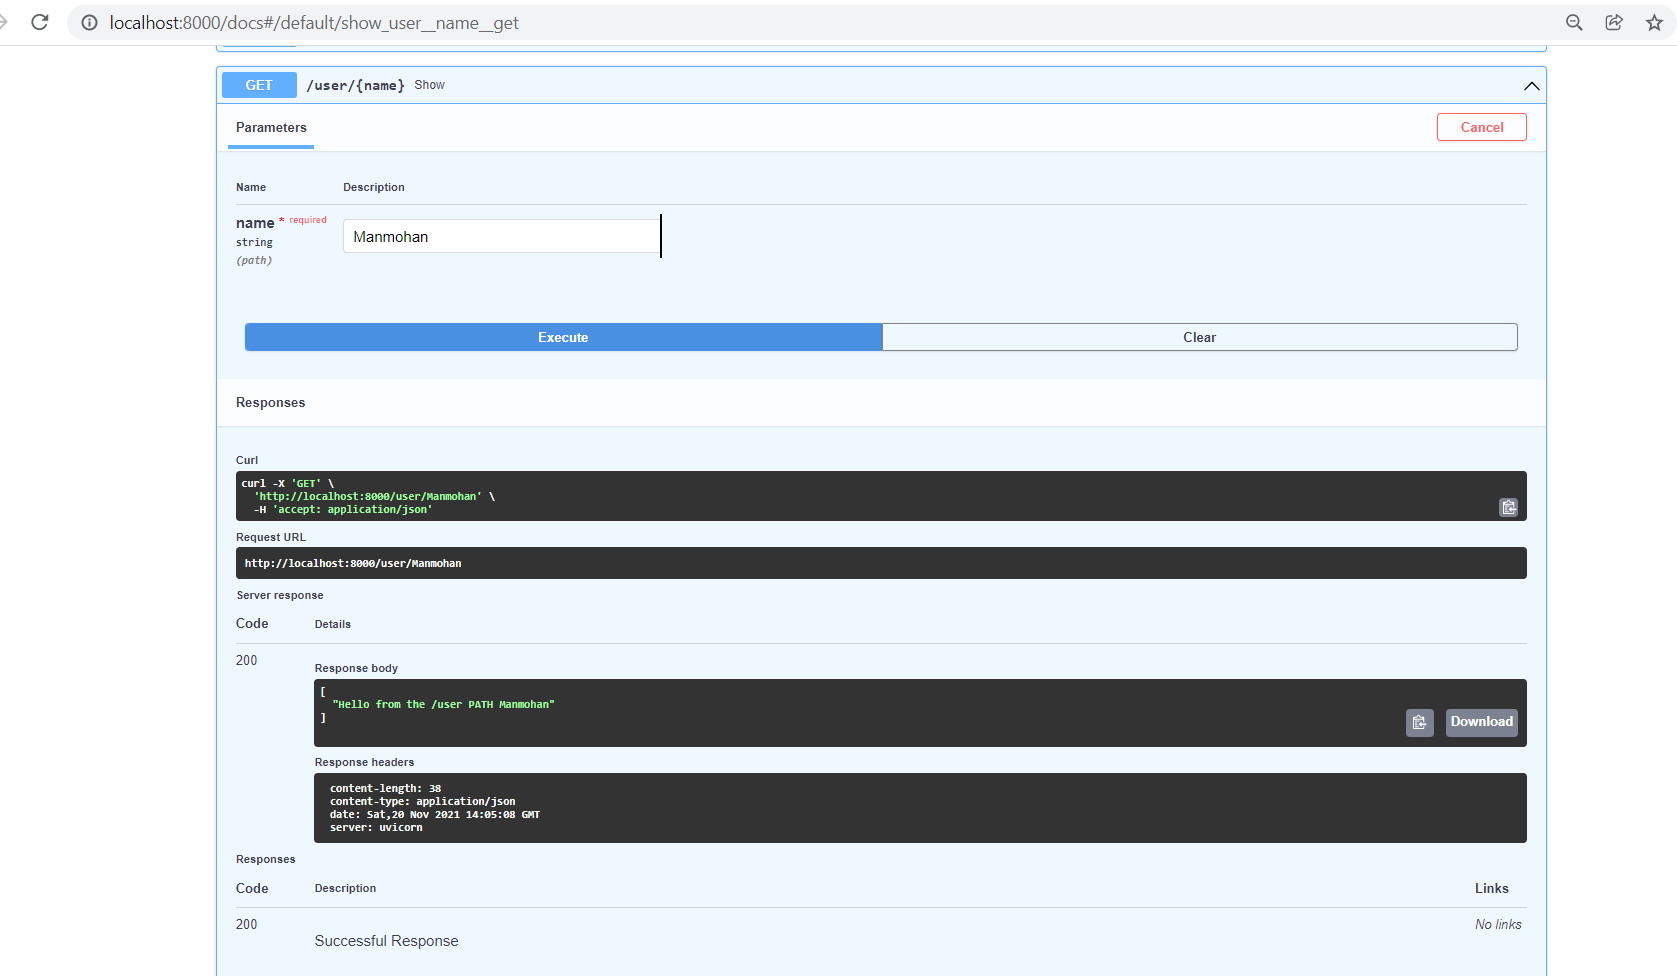
Once you click on Execute button you will get the response from the API as below:
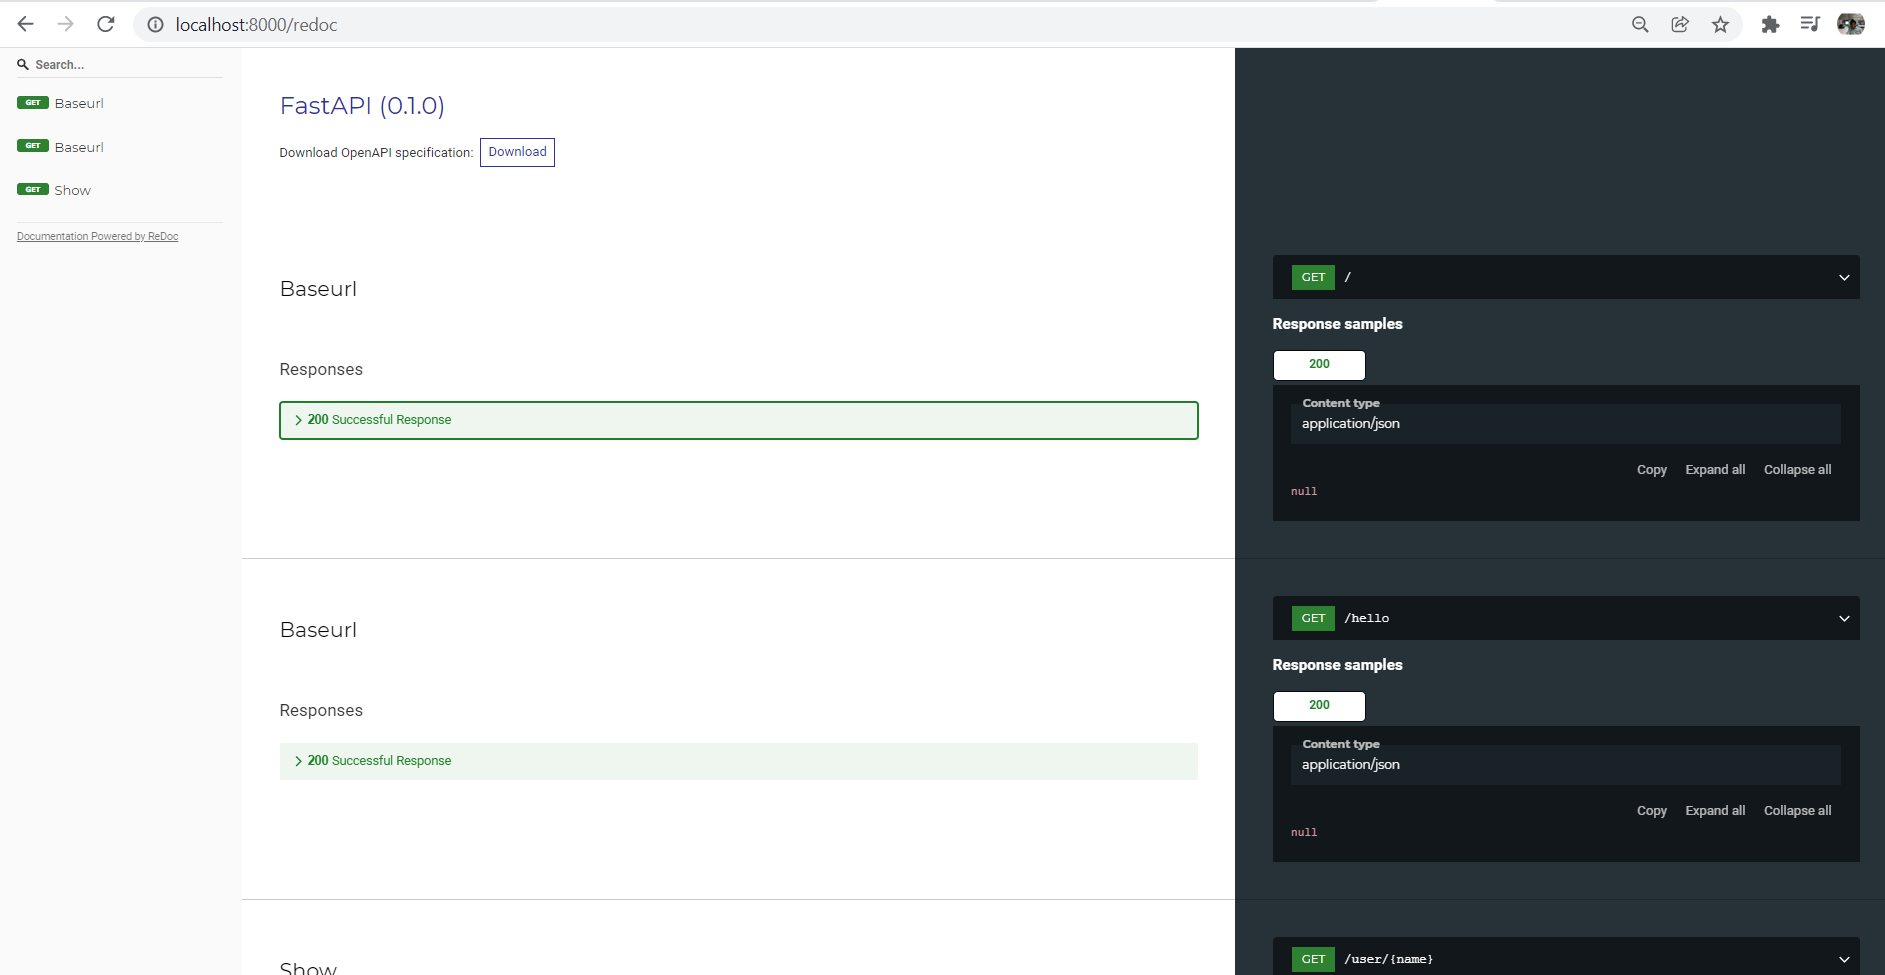
Because of this you don’t need another tool such as Postman to test your API. There is also another type of API documentation available with FastAPI which is called “redoc”. To access this documentation simply add the keyword “redoc” to your base API URL. In our case its “http://localhost:8000/redoc” . This looks as below:
So this is all about “Create simple API using FastAPI in Python”.